-40%
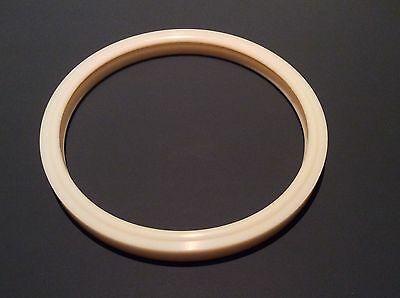
Pentair Amerilite SAM Swimming Pool Light Lens Gasket O-170 79101600 79101600Z
$ 6.83
- Description
- Size Guide
Description
Pentair Amerilite SAM Swimming Pool Light Lens Gasket O-170 79101600 79101600ZReplacement pool light lens gasket for the American Products/ Pentair Amerlite and Sam Pool Light.
Part Number:
0-170
is a direct replacement for the American Products part:
79101600
Size:
8-3/8"
in diameter
__________________________________________________________________________________________________________________
Replacement of gasket & bulb
Note:
Do not replace a bulb/gasket on a older pool light in which the bulb socket is not set in a epoxy shell. The entire light must be replaced. All work on a pool light must be performed by a person or qualified electrician which is familure with electricity and with the electrical codes in your area.
1
Do I have to drain the pool to fix my light?
That's the question we most often get when a customer's light doesn't work. Fortunately, you shouldn't. The first thing you will need to do is to make sure that the circuit breaker is not tripped. If the circuit breaker is tripped, turn off the light to the pool and try turning on the circuit breaker. If it trips immediately, you have a short circuit in which case you need to get an electrician to correct this. If the circuit breaker is not tripped, you will now proceed to checking the GFCI (Ground Fault Circuit Interrupter).
You can think of a GFCI as a circuit breaker that is much more sensitive than your standard 15/20 amp breaker in your electrical panel. It is designed to trip when it detects a very small current going to ground. If you don't understand this, just know that it is designed to prevent electric shock from your pool light.
The GFCI can be found in several locations. It is easiest to locate by the test button that is part of it. The most likely locations for the GFCI are your main panel box for your house a subpanel box at your pool filter system, or an electrical outlet near the pool.
Once you have found the GFCI, check to see if it has been tripped. With the pool light switch still off, push the test button. If it "pops," you know that there is power to this point and that it was on. If it doesn't "pop," try pushing in the reset button and see if it holds. If it doesn't hold or immediately trips, you will need to call an electrician to track down the problem and correct it. If it does hold, try turning on your pool light.
Note:
At this point your light may come back on. This can be due to a small amount of water being inside your light fixture which the light may heat up and vaporize. This can then cause the GFCI to trip. GFCIs are also known to trip from extreme humidity. Be sure that the outlets that may be on the same GFCI are covered to help prevent this.
2
If after turning on the pool light switch the GFCI trips, the most likely cause is water inside your light fixture. If the GFCI doesn't trip and the light is off, you probably have a burned-out bulb. In either case, you will now proceed to pulling your light fixture out of the pool.
3
First make sure that the breaker, GFCI, and pool light switch are all off. It is a good idea to put a piece of tape over the breaker to help keep someone from turning it back on. Now, to get the light fixture out, you will need to unscrew the small pilot screw that holds the fixture in. This screw is usually a Phillips screw (top looks like an X) and is at the top of the fixture, closest to the light lens. Do not confuse this screw with the screws that circle the light and hold the light ring on a vinyl liner pool. After loosening this screw, you should be able to bring the light fixture out of its niche and up out of the water and onto the deck. Note: Some lights are held in by a clip in which case there is no pilot screw and you will need to use a screw driver to pry it out. Make sure yours is this type before prying or you may break the fixture or niche.
4
Sometimes the cord may not be long enough for the light to reach the deck. After questioning the ancestry of the idiot who installed the light, you will need to go to the junction box that the light cord is connected to. This junction box could be inside your dive stand. You will need to disconnect the light cord at the junction box and be sure to attach a piece of wire or strong string to allow you to pull the cord back when you are finished.
Note:
Pool lights are designed to have water inside the niche that holds the light fixture. This helps cool the light and allows you to pull out the fixture with water still in the pool.
5
Now that you have the fixture on the deck, you can open it up. You will find one of two types of fixtures. One type has many screws around the back of the fixture rim; the other has one screw that tightens a band clamp that holds the fixture together. After removing the clamp or screws, you may need to pry open the fixture. Be careful not to break the lens when you do this.
6
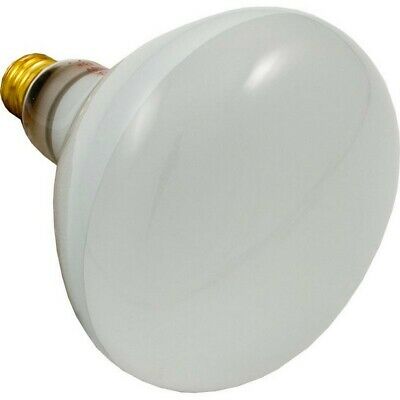
Now, with the fixture open, you may see the water that was causing the GFCI to trip, in which case you will need to dry out the inside of the fixture with a towel for this. You should remove the bulb and dry the connections thoroughly. Note: Halogen bulbs should not be touched directly with your hands. The oils from your skin can reduce the bulb life. After drying thoroughly, put the bulb back in and try turning on the light for a few seconds. Do not leave the light on for more than a few seconds. Remember, it is supposed to be water cooled. At this point, you may find the bulb is burned out and needs replacing.
7
If the bulb is burned out, replace it and try to turn it on for a few seconds to test it. Now, having fixed the problem, you can proceed with reassembling the light fixture. Be sure that the breaker, GFCI, and pool light switch are all off. You should always replace the light gasket because the high temperatures of the light can make the gasket form to the fixture, and you cannot put it back exactly the same way. Be sure to tighten the screws evenly on the fixture to prevent it from warping and not sealing properly. For the clamp type, it is a good idea to tap around the ring as you tighten to even out the pressure around the ring.
8
Now, hold the fixture underwater and look for bubbles coming from around the gasket. If this happens, you may need to reopen the fixture, dry it out, and reassemble.
9
You can now put the fixture back into the niche. For the deep fixture lights you can wrap the cord around the fixture. There is a notch on the bottom of the fixture that catches on the bottom of the niche. Now, screw in the pilot screw or snap in the clipable type.
Note:
Installer assumes all responsibility of the installation.
